
We're right in the peak of the Sun's activity during this current solar cycle (11 years). That means, for those living in northern tier states have a good chance of seeing the Northern Lights when the sun sends a coronal mass ejection (CME) our way. Solar activity increases dramatically during the years that mark the peak of sun spot activity. When the activity is high, there are higher chances that great magnetic filaments on the surface of the Sun bend, twist and suddenly snap, unleashing millions of tons of energetic plasma into space. Sometimes these explosions are Earth-directed. When they expand through space and interact with the Earth's magnetic field, the ions in them energize and illuminate, giving us the dramatic night feature we call the Aurora Borealis.
Photographing the Aurora can be a challenging but rewarding activity, and personally, it's one of my favorite. The technique is very much like photographing lightning. Even when your eye can't see the greens and reds of the aurora, your camera almost certainly can.
Before you go, you will need to know if there's any activity in your area and what indicators to watch.
The Indicators
There are two critical pieces of data you will need to monitor: the Planetary Kp Index ("Kp") and the direction of the interplanetary magnetic field ("Bz").
You can track them here: Planetary Kp Index and Interplanetary Magnetic Field graphs.
The Kp is essentially a strength indicator that tells if your magnetic latitide (similar to geographic latitude) will be in view if the conditions are ideal. They range from 1 (very far north) to 7 (middle of the US):

You can see that most of the US ("mid-latitude" needs a Kp of 5 or higher. However, the Kp index is not the only indicator. It has to be coupled with a southerly IFM. This is indicated by a negative Bz value. The more negative, the better the chance that the Earth's magnetic field is aligned for a large display of aurora. If the Kp index is high enough for your area and the Bz component is zero or negative, you probably have a good chance to see them where you are, weather permitting.

Where to go?
Anywhere with a broad, north view. Position yourself north of any large sources of light pollution to improve the chances of seeing faint details. What to avoid: high school stadiums, city cores, shopping malls, car dearlerships. Any kind of area that pumps a lot of light into the sky should be south, or at minimum, east or west of you. Avoid any northern obstructions: trees, hills, buildings. These may block the northern lights if they're low to the horizon. If you have the time, look for an interesting foreground subject: mountains, trees, buildings (dark, not too iluminated) or water.
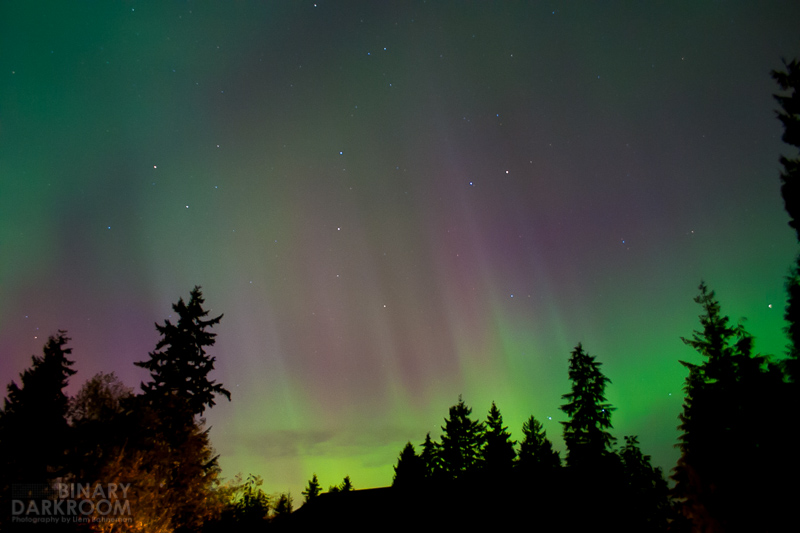
What to expect?
If it's a very strong storm, after your eyes have dark adjusted (30-40 minutes) you may see a green arc across the sky with some vertical ripples that slowly change shape. If you have an extremely dark location and a strong storm you may even make out the violets and reds with your eyes. If you're in a suburban location with moderate light pollution, you may onle see a dim gray/green arc that appears to slowly change shape. Conditions have to be ideal to see much detail, but don't be disheartened. Your camera will amaze you!
What you will need:
- A tripod
- A DSLR
- A shutter release cord
- Patience
The settings:
Start out with these, and adjust to suit the detail you want and to manage any light pollution:
- ISO: 800
- f stop: f/6.3
- Shutter: 15-20 seconds
If there is too much light pollution and it's fogging out the details, decrease the time to 5-10 seconds or step down the ISO. If you want more detail in the curtains and rays, decrease the exposure time and bump the ISO. Use a shutter release cord so you're not introducing any shake into your setup when pressing the shutter release.
Focusing is a challenge. What I recommend is focus on the most distant bright light source you can find: street light, moon or bright star (use your LCD live view+zoom if you have it) and focus MANUALLY. Keep your lens on manual focus. That way your camera never has to "hunt" (which may be impossible with a dark sky). If you adjust your zoom any, you will most likely have to refocus.
Just keep shooting. You can toss the blank exposures later, just capture everything. You could even make a time lapse movie if you're so inclined:
Aurora Borealis - June 28, 2013 - Monroe, Washington from Liem Bahneman on Vimeo.
Experiment with your settings. But the above ones should get you in the realm of capturing one of nature's most fleeting but incredible displays.
Helpful links:
Spaceweather.com
3-day Kp plot
POAS Auroral Activity
OVATION
Space Weather Now
OVATION prime

